DOWNLOAD INSTALLATION CHECK LIST Click Here
NRG 50mm GREENBOARD +
NRG 25mm GREENBOARD TILE (900 x 900 x 25)
1. SELECT & FIX NRG:
50mm Greenboard as per standard NRG Specification Manual.
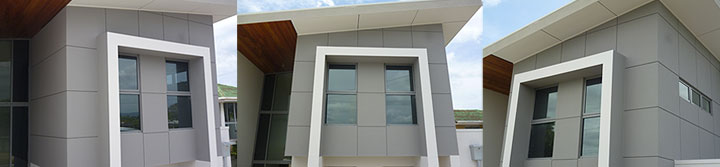
2. DESIGN:
Symmetrically designed grid pattern selected. Set out on NRG Greenboard wall elevation. Using level, straight edges, and/or chalkline, create your desired NRG Feature Clad elevation . Feature bead dimensions are 15mm (width) x 10mm (depth). So for tolerance factors, allow a 20mm dimension for all horizontal and vertical width set-out. The depth dimension is automatically gauged by NRG Symmetri Panel. (TIP: Scale design brief options, onto plan elevation. Select, and transfer to full scale wall, factoring in windows / doors to achieve final grid design.)
3. INSTALL:
NRG Symmetri-Clad Tile Dimensions are sized @ 900mm x 900mm x 25mm. Simply cut desired NRG tile size to symmetrical layout pattern dimensions. Using screw mechanical fixings, (see Screw fixing table 1.0) in combination with foam glue adhesive, place panel into position, ensure all air pockets from foam glue adhesives are pressed out. Firmly apply pressure to panel, then mechanically screw/washer fix, through 1st layer of NRG Greenboard cladding, into wall structure.
4. NRG PVC JOINTERS:
(INTERSECTION) With precision, place NRG PVC Intersectors into position . Using Bostik ‘no more nails’, position and fix accurately using galvanised 30mm clouts, press clouts into NRG polystyrene to locate exact coordinate. Using a polyurethane based UV adhesive sealant, apply a fine line of sealant into outer housing recess, ready for the final connection of main feature recess bead. This ensures a water-tight seal of PVC butt joints at all intersections.
5. INSTALL PVC BEADS:
With precision, install NRG feature recess bead, vertically (plumb) and horizontally (level). Cut 100% precise butt joins between already installed NRG PVC Intersector jointer. For external and internal corners, (see ‘TIP’ below) cut accurate 45 degree mitre/s.
Apply Bostik seal’n flex to NRG PVC jointer housings, prior to installation of main recess beads. Using Bostik ‘no more nails’, glue main bead into position, and press into housing joint of NRG Jointer. Alignment, to all PVC joints is pivotal. NRG starter beads size are 75mm, to suit NRG composite laminate, finished dimensions. (TIP: Using a 4” grinder with either a ‘waifer’ or ‘Diamond’ blade, ensures precision PVC bead intersection joints)
6. RENDER: NRG Polymer modified render, 1st and 2nd coat with fibreglass mesh,(as per NRG Spec.)
7. Acrylic Texture: NRG acrylic sponge fine render application, , as per NRG Render Specification
8. PAINT: NRG Shield Coat ... Exterior paint applied finishes as per required specification.